FabScraps C124 Reawakening
Theatre Fold Scrapbook Layout

Requirement List
-
1)
2 x (12”x12”) thick cardboard (mounting board -about 2mm thick)
-
2)
4 x Matching Cardstock
-
3)
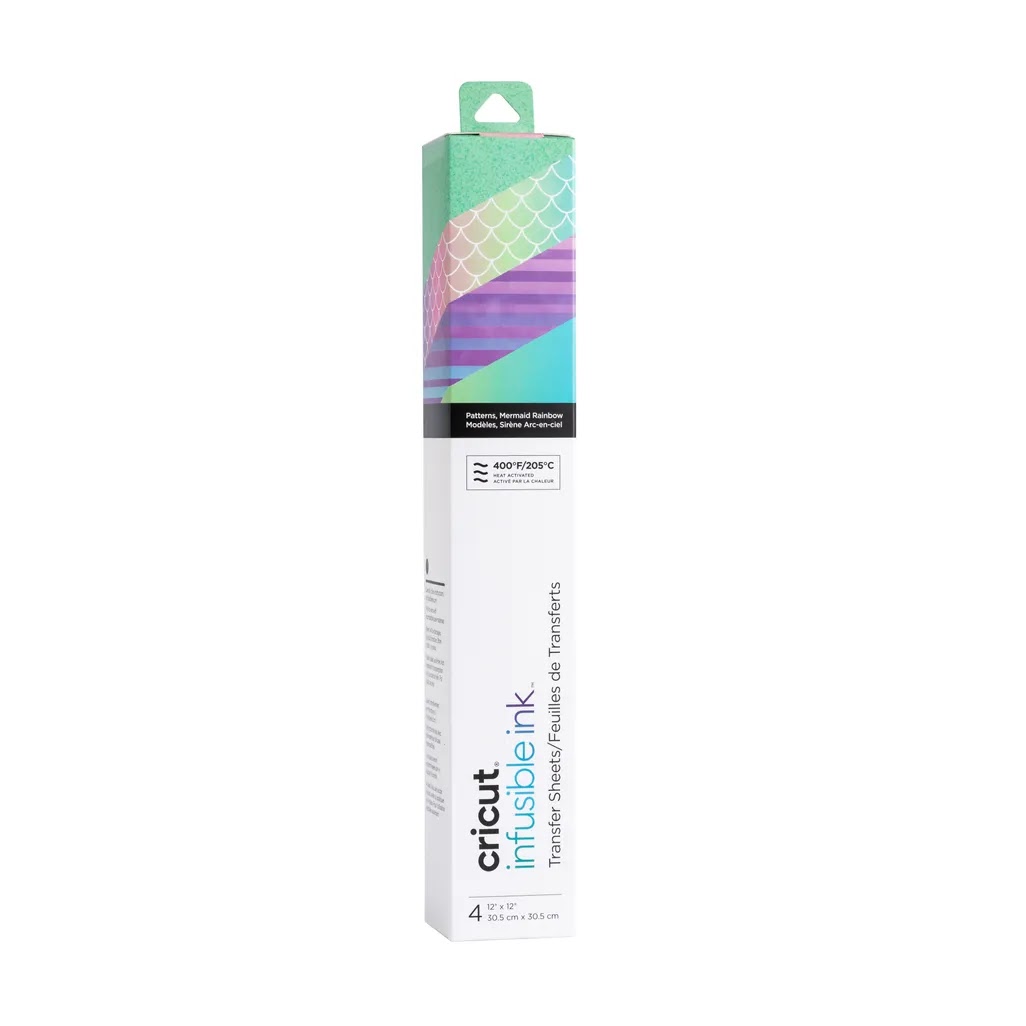
2 x Pattern Paper (I used Fabscraps – you can choose any paper – 1 sheet
will be for the front that will be cut in half for the opening of the
“stage”, and 1 sheet for the background)
-
4)
2 x strips of acetate or transparency of you want to make some “floating”
elements - optional
-
5)
Photos: 3 x landscape
-
6)
Embellishments: fussy cuts or ephemera, flowers etc.
-
7)
Adhesive: Very strong glue – I prefer Art Glitter Glue or Magic Glue – something
that dries clear – not tacky else if you mess a bit, your mechanism gets
stuck together.
-
8)
Tools: (all measurements will be in inches) Metal Ruler, Craft Knife, Trimmer,
Scoring Board & Bone Folder, Scissors, Pencil, Circle Punch (1 – 2
inch) or you can use some small round opject to make markings and cut by
hand if you don’t have a circle punch.
Instructions
1)
Front Frame:
a.
Measure 1” from the outside of all 4 sides of 1 of the mounting
boards. With your craft knife
and ruler, cut out the center square to form a frame.
b.
From the matching cardstock, cut 3 strips measuring 1”.
c.
Cut 1 of the strips in half and glue halves to the other 2 strips,
overlapping about 1” – you will now have 2 strips measuring 17”.
d.
Take each strip and place it over the frame with the center of the strip in
the center of the frame – it will overhang on both sides. No fold it back around the frame. This is just to get a bit of play on your strip and will ensure that you
have some movement space for your mechanism. Lift the strips up, fold the
overhand pieces in onto itself, and glue only the short sides of the strip,
to one side of the frame. Repeat for the other strip, and glue onto the
opposite side of the frame. You will now have a frame with 2 slots, one on the left and one on the
right.
e.
Flip the frame around so that the slots are at the back.
f.
To cover the mounting board: Glue the front of the 1” frame and Adhere a 12
x 12 sheet of matching cardstock on top. Burnish well. Cut out the center of the matching cardstock (using your
craft knife and ruler and cut from the back) so that you end up with a
covered frame.
g.
You will now have a frame that is covered with matching cardstock in the
front, and 2 slots at the back, left an right.
h.
Measure the center of the left and right sided (6”) and With your circle
punch, punch halfway into the frame to make a notch.
2)
Doors:
a.
Score 2 matching cardstocks at 6” and 9” (you need to make 2 of these)
b.
Fold on all score lines and burnish.
c.
Glue the doors to the second mount board as follows:
i.
Mark the left and right sides of the mount board.
ii.
Fold both cardstocks on the 6” score line and make sure the 6” sides are at
the top, and at the bottom, you will have a score in the middle of the back
half – your fold will be on the right.
iii.
Now flip one of the cardstock pieces so that the fold is on the left. You
will now have one piece with the fold on the right, and one with fold on the
left.
iv.
Left door: Adhere glue ONLY to left bottom 3” and adhere to the left side
of the mountboard
v.
Right door: Adhere glue ONLY
to the right 3” and adhere to the right side of the mountboard.
vi.
You should now have 2 doors that lifts up and out.
3)
Inside background and door cover:
a.
Lift both doors up and out and push doors flat to the sides. You should now have a 6” center section, with a 3” and 6” sections of the
doors on both sides.
b.
Mart the center of you background pattern paper and the 6” center section
of your background and glue your pattern paper down with the centers
aligning. This should now
cover you center background the 3” sections on both sides.
c.
Cut the pattern paper that you want to be on the doors, in half – you
should have two 6” x 12” pieces.
d.
Close the doors again and glue the door front pattern papers to the front
of the doors.
4)
Slots for the theatre effect:
a.
You will now cut slots in the door mechanism that will have the sliding
pieces that give the theatre effect when the doors are opened. Do one door at a time.
b.
Take your left door and fold it open over your right door – you will now
see the back of the right door.
c.
On the 3” panel that is not glued down, draw horizontal line 1” from the
bottom and 3” from the bottom. Make a 1” and 2” pencil mark on each line. Now connect the pencil marks so that you have 2 vertical lines running from
the 1” line to the 2” line. This marks the 2 slots.
d.
Placing a cutting mat or a thick piece of cardboard underneath the door,
cut the 2 slots with your craft knife. You have to cut it about 1mm to 2mm wide to allow for movement of the card
that will be pushing through these slots.
e.
You will now have 2 slots measuring 2” long.
f.
Repeat steps a – d for the right side door.
5)
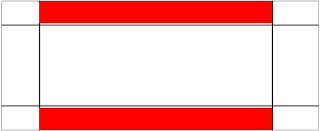
Inserts:
a.
Cut 2 pieces of cardstock measuring 8” x 3”.
b.
On the 8” side, measure 1” in from the left and 1” in from the right – top
and bottom. Connect the dots
so that you have 2 vertical lines, left and right.
c.
On the 3” side, mark at ½ “ from top and bottom. Connect the lines so that you have 2 horisontal lines, ½“ from top and
bottom.
d.
Cut out the sections that are marked in red in the picture below
e.
Now fold the flaps that formed on the sides, in on the log side, so that
you end up with an 8” long strip that will fit through the slots that was
made in step (4).
f.
Slip the strips through the slots, and bend the flaps open again. This will ensure that they will not slip through the slots when the page is
opened and closed.
6)
Adhere photos:
a.
Cut 3 strips of cardstock, 1” wide.
b.
Score as follow:
i.
Piece 1: ¼”, 3 ¼ “, 3 ½”, 6 ½”
ii.
Piece 2: ½”, 3 ½”, 4”, 7”
iii.
Piece 3: ¾“, 3 ¾”, 4 ½”, 7 ½”
c.
Fold on all score lines to make rectangles and glue. Gut of excess.
d.
Matt photos.
e.
Space the rectangles on the inside of the theatre, using your photos to
make sure they are spread evenly. Glue rectangles to the inside of the folds
– gluing only the bottom and side. Ensure to close the pages to make sure the rectangles fold flat when the
page is closed.
f.
Adhere the photos by gluing them to the top of the rectangles. The photos will now pop up on different levels when the page is opened and
closed.
7)
Assembling final page:
a.
Slip the doors through the slots that you made at the back of the front
frame, and move the frame to the center so that is all aligns.
b.
You can now pull the doors open and closed by pulling them where the
notches were made on the side of the frame.
8)
Decorating:
a.
Add fussy cuts and flowers to the frame as desired, making sure you only
glue on the frame, and not getting glue on the doors.
b.
To decorate the inside moving inserts, you can add some pattern paper and
fussy cuts. Just ensure not to
stick them all the way from left to right, so that they can still move
through the slots when closing the doors.
And that is a theatre fold layout. I hope you enjoyed this project and I cannot wait to see your finished
projects.